


Part III: Adding a CDN to your AWS S3 hosted Website
This post's a continuation of Part II: How to deploy a Gatsby website to AWS S3 with Gitlab CI.
In this post, I will cover how to add Cloudflare CDN to your AWS S3 Gatsby hosted website.
Content delivery network (CDN)
A CDN is a geographically distributed group of servers, as pictured below, that works together to provide fast delivery of Internet content.
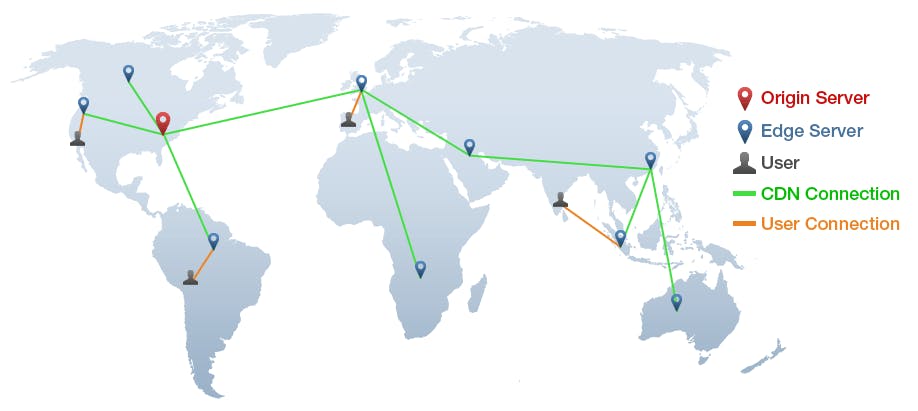
Image credit: ©GTmetrix
And why should you use a CDN?
By using a CDN to serve the content of your website, it allows your website assets to be quickly loaded, including all HTML pages, javascript, and basically all the media assets that you need to be served. Today, almost every website is served through CDNs, and those who don't are negatively impacted in load speed resulting in bad search ranking (bad SEO), thus being very important to serve your website under a CDN.
So what are the major benefits of using a CDN?
- Improved load time.
- Reduced bandwidth costs.
- Increased content availability and redundancy.
- Better search ranking.
Cloudflare
In this starter we will use Cloudflare, to demonstrate how to add a CDN to your S3 bucket. We choose Cloudflare because it is simples to work with, and their free plan already includes their CDN and SSL.
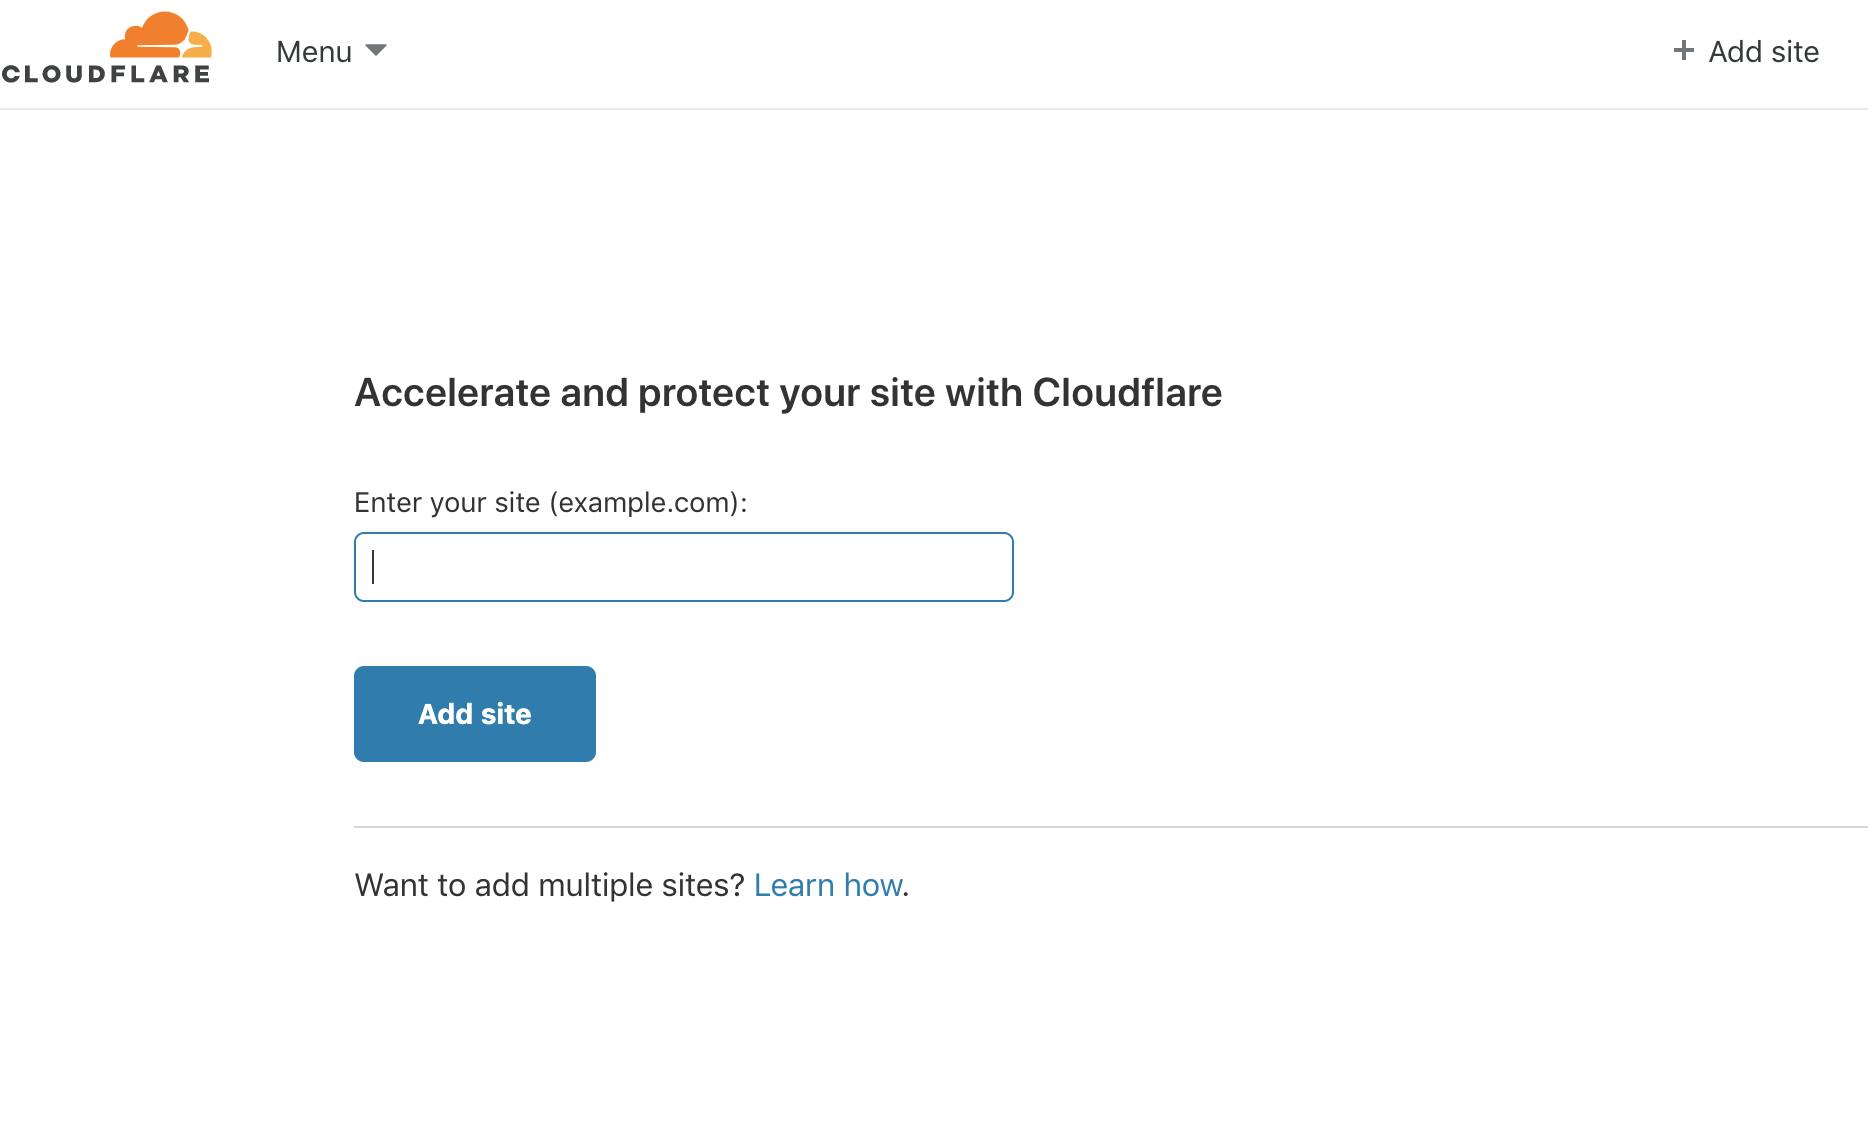
1. Add Site
To use Cloudflare CDN, you should first add your domain to Cloudflare. To do that, go to Cloudflare, sign-up if you aren't already registered, and after that, you should add your domain by clicking in the "+Add site" button. Then, you should enter your domain, and click in "add site", as pictured below.
(Note: You might need to update your DNS servers on your domain provider to use Cloudflare ones)
2. Add Records
Perfect! Now that you added your site/domain to Cloudflare it's time to add the proper DNS records, but before you do that you need to go to AWS Console, to grab your S3 bucket link.
So, go to AWS, and do as follow:
- Navigate to S3 in your AWS Console
- Click on your bucket
- Go to the "Properties" section
- Select "Static Website Hosting"
- Copy all the content from "endpoint" (ex: "http://mys3domain.com.s3-website.eu-west-2.amazonaws.com")
Now that you have the endpoint for your s3 bucket it's time to create a CNAME to link your domain to your S3 Bucket. So, please go to Cloudlfare, and do as follow:
- Navigate to your website domain
- Select the DNS tab
- Press "Add Record"
For your record configuration, select the following (as pictured below):
- Type: CNAME
- NAME: @
- Target: insert your s3 endpoint without HTTP (ex: mys3domain.com.s3-website.eu-west-2.amazonaws.com)
- TTL: Auto
- Proxied: Leave it as it is

Nice, now you can access your website through your domain by typing: mys3domain.com.
However, if you try to access your site through the "www" you will get an error:
" 404 Not Found, Bucket not found".
That happens since your bucket name doesn't start width "www", and AWS tries to match the bucket name with your domain URL. But don't sweat, you don't need to create another bucket just for that, by adding a page rule you can redirect all the traffic from WWW to your domain's root.
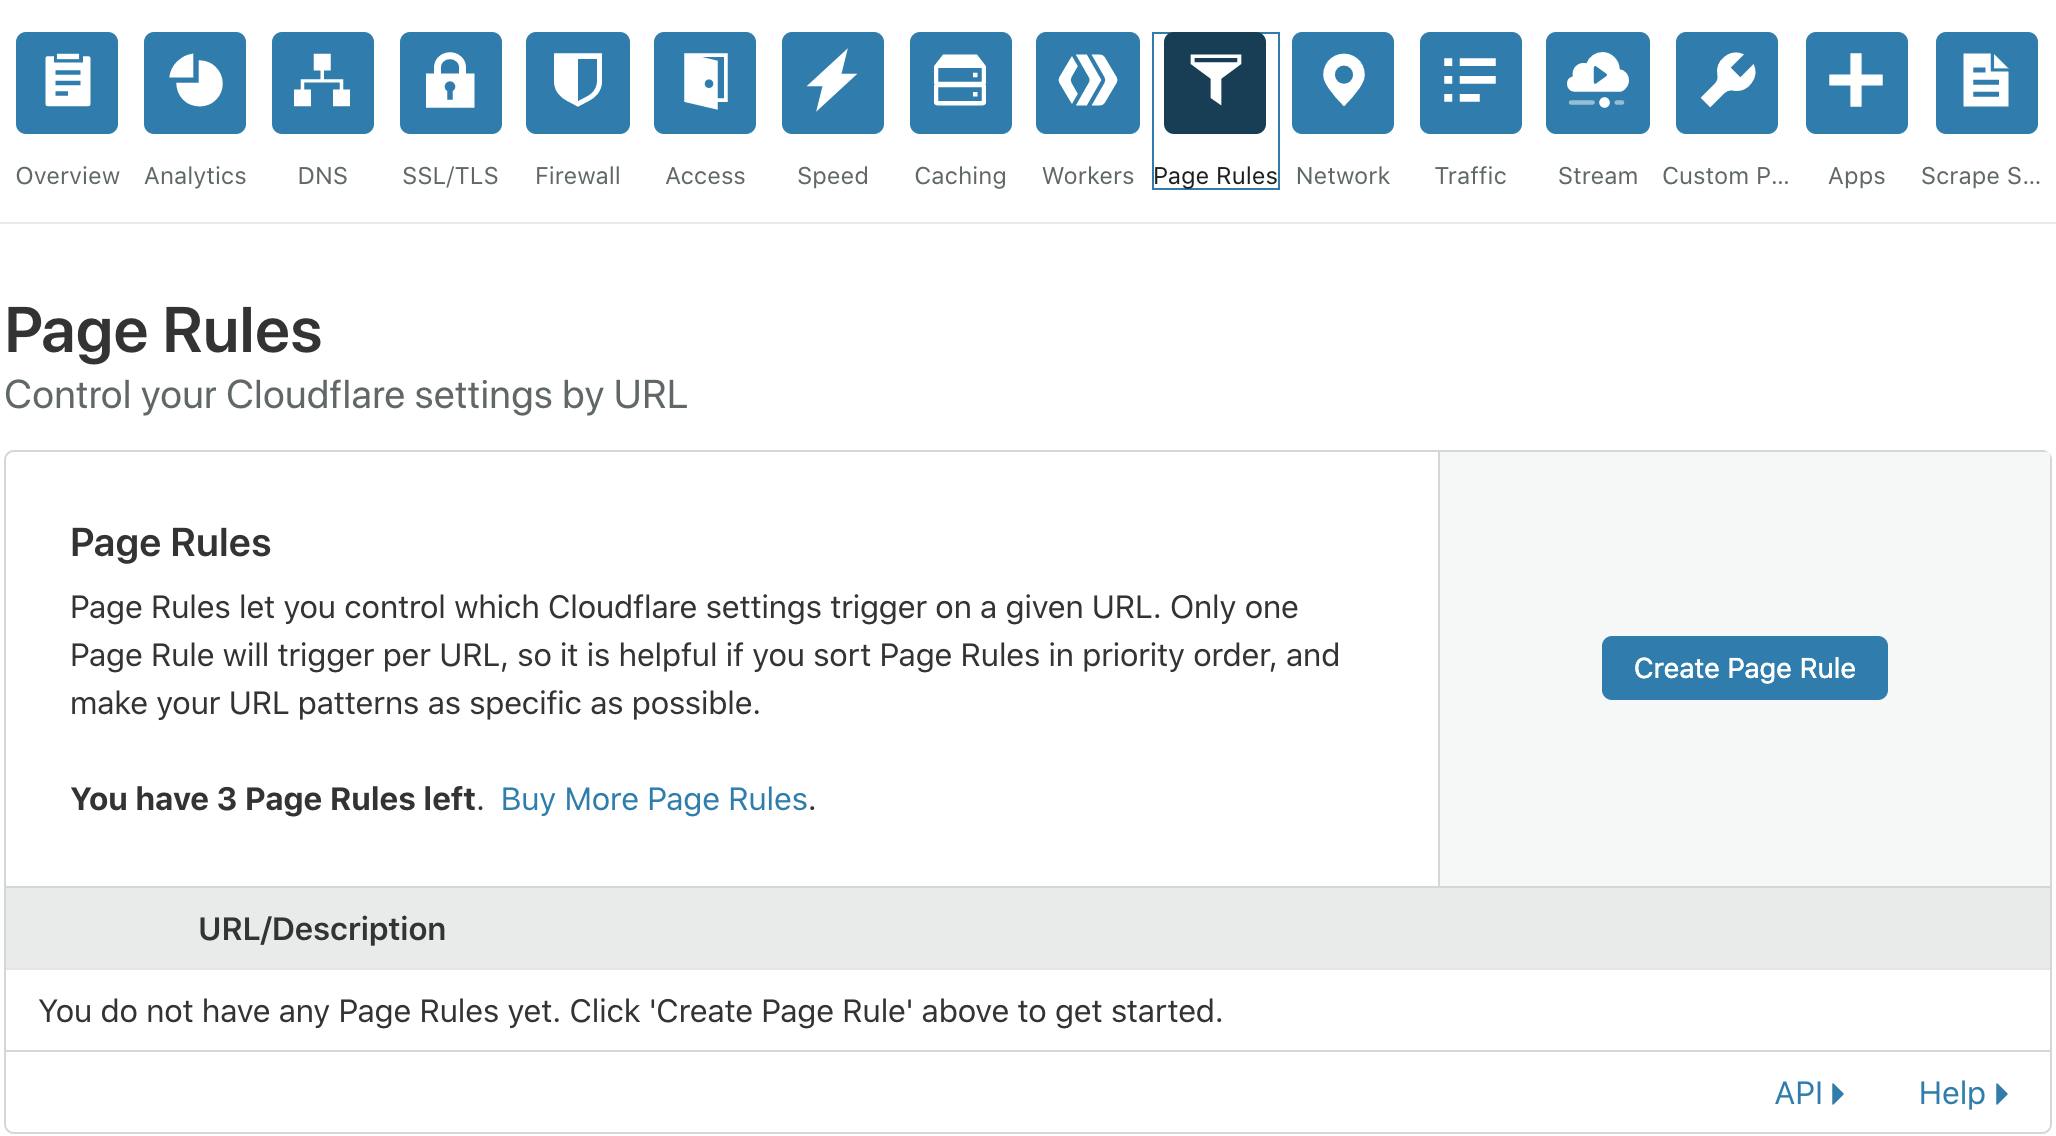
To create the page rule, do as follow:
- Go to Cloudflare dashboard
- Select your domain
- On your domain dashboard, select page rules
- Press "Create Page Rule" button (as pictured below)
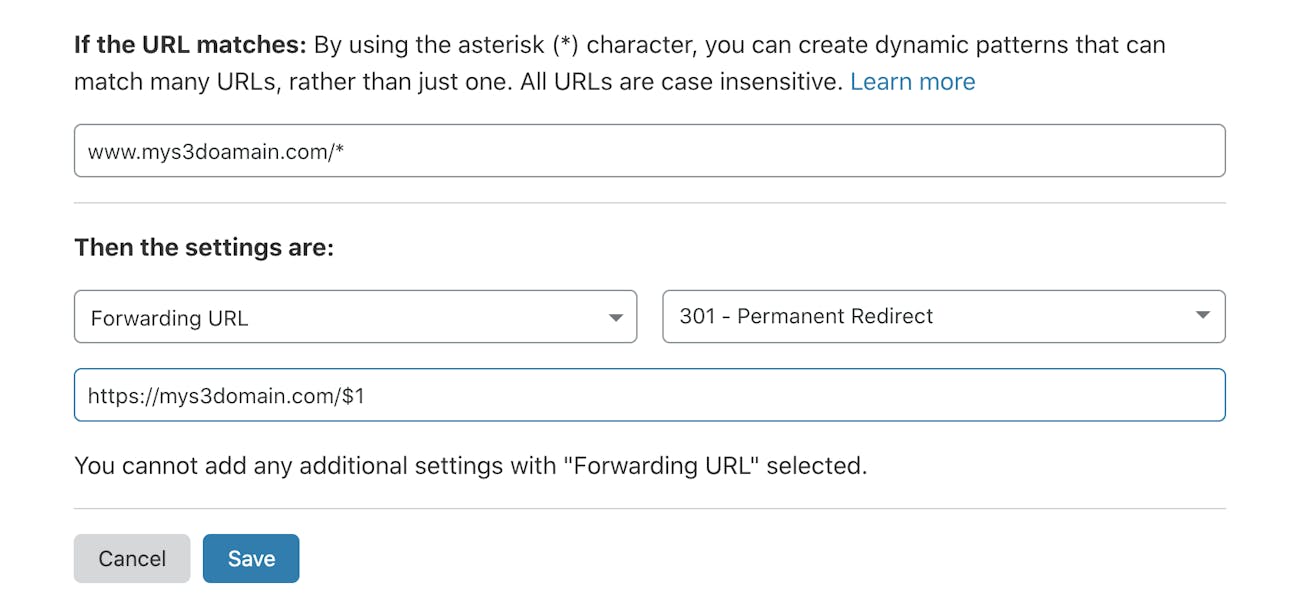
For your page rule configuration follow these steps (as pictured below):
- URL: "WWW.mys3domain.com/*"
- Settings: Select "Forwarding URL"
- Then select: "301-Permanent Redirect"
- Redirect URL: https://mys3domain.com/$1
Perfect, now your website can be accessed by both ways. And because is being proxied by Cloudflare your content will be server by Cloudflare CDN, making it faster.
3. SSL/TLS Configuration
But now you should be wondering how to get rid of "Your connection it's not secure" warning, since you're accessing your website through HTTP and not HTTPS.
For that, please do as follow:
- Go to Cloudflare dashboard
- Select your domain
- Navigate to your domain dashboard
- Select SSL/TLS Tab
Then, on Overview Tab select:
- SSL/TLS encryption mode: Flexible
Edge Certificates:
- Always Use HTTPS: ON
- Opportunistic Encryption: ON
- TLS 1.3: ON
- Automatic HTTPS Rewrites: ON
And that's it, now you are website has an SSL certificate and is being served by Cloudflare CDN.
Hope you enjoyed this tutorial, stay tuned for more.
Please let me know your thoughts or follow me on Linkedin.

